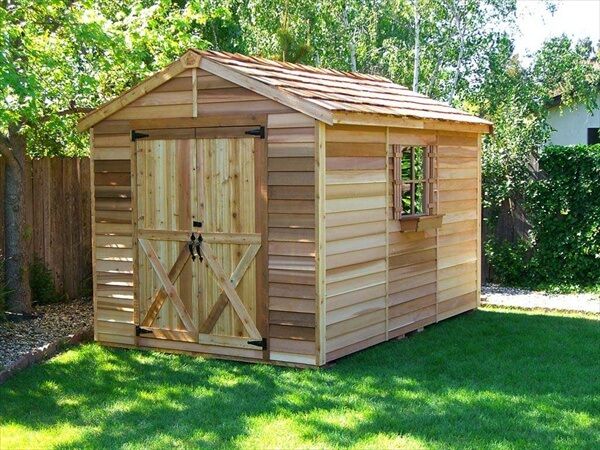
Constructing a Cost-Effective Wooden Pallet Shed: A Comprehensive DIY Guide
The allure of a personalized outdoor storage solution is undeniable, particularly for the budget-conscious DIY enthusiast. This comprehensive guide details the process of constructing a robust and aesthetically pleasing shed using reclaimed wooden pallets, offering a significant reduction in material costs compared to traditional shed construction. This approach not only saves money but also promotes environmentally responsible practices by repurposing readily available materials.
Planning and Preparation: Laying the Foundation for Success
Before embarking on the construction, meticulous planning is crucial to ensure a successful outcome. This phase involves several key steps, each contributing to the overall project efficiency and structural integrity.
Determining Shed Dimensions and Location
The initial step involves determining the desired dimensions of your pallet shed. Consider the intended storage capacity and the available space in your yard. Accurate measurements are paramount. Ensure the chosen location provides adequate access for construction and future use, while also considering factors like sunlight exposure, drainage, and proximity to existing structures.
Gathering Materials and Tools
The beauty of this project lies in its reliance on readily available and cost-effective materials. The primary component, of course, is reclaimed wooden pallets. Inspect each pallet carefully for structural soundness; discard any exhibiting significant damage or rot. You will also need additional materials such as:
- Concrete blocks or a similar foundation material: Provides a level base and elevates the shed off the ground.
- Exterior-grade screws and nails: Choose corrosion-resistant options for longevity.
- Plywood or OSB sheeting: For the roof and any interior wall sections requiring more robust construction.
- Roofing felt or similar waterproof membrane: Essential for protecting against the elements.
- Exterior-grade paint or sealant: Enhances durability and aesthetics.
- Hinges and a latch mechanism: For the shed door.
In terms of tools, you'll require a standard DIY toolkit, including a hammer, screwdrivers, a drill with appropriate bits, a measuring tape, a saw (circular saw recommended), a level, and safety glasses.
Site Preparation and Foundation Construction
Prepare the ground by clearing any vegetation and leveling the area where the shed will stand. Construct a sturdy and level foundation using concrete blocks, setting them in a pattern suitable for the planned shed dimensions. Ensure the foundation is perfectly level to prevent structural issues later.
Constructing the Shed Frame: A Step-by-Step Guide
With the foundation in place, you can begin the framework construction. This phase requires careful attention to detail to ensure structural integrity.
Assembling the Pallet Walls
Begin by inspecting the pallets thoroughly to assess their suitability. You'll likely need to disassemble some pallets to acquire the necessary lumber for creating a complete and robust wall structure. Carefully remove any nails or screws that are loose or damaged. Construct the walls by strategically arranging and securing the pallets, ensuring vertical alignment and stability. For added strength, consider using exterior-grade screws or bolts to join the pallets together.
Building the Roof Frame
The roof frame should be designed to support the weight of the roofing material. You can construct a simple gable or shed roof using lumber from disassembled pallets or additional purchased lumber. The framing should be sufficiently strong to withstand anticipated loads, including snow and wind.
Attaching the Walls and Roof
Carefully raise and secure the pallet walls onto the foundation, ensuring they are plumb and square. Once the walls are firmly in place, carefully attach the roof frame to the top of the walls. Ensure all connections are secure and adequately reinforced.
Completing the Shed: Refinements and Finishing Touches
The final stages involve adding finishing touches to enhance the shed's functionality and aesthetics.
Roofing and Waterproofing
Once the roof frame is secure, apply a layer of roofing felt or another suitable waterproof membrane to protect the shed’s interior from rain and snow. This is crucial for long-term durability. Consider adding a layer of shingles or other roofing material for a more aesthetically pleasing finish.
Adding Doors and Windows
Construct a door frame using lumber and attach hinges to allow the door to open and close smoothly. Secure a latching mechanism to keep the door securely closed. If desired, you can incorporate windows for added light and ventilation. These can be simple, commercially available windows, or you could construct your own using reclaimed materials.
Interior Finishing and Exterior Treatment
Once the structure is complete, consider applying an exterior-grade paint or sealant to protect the wood from the elements and enhance its aesthetic appeal. For the interior, you might choose to add shelving or other organizational elements to maximize storage space. A simple coat of interior paint can also improve the look and feel of the interior.
Safety Precautions and Considerations
Throughout the construction process, safety should be your top priority. Always wear appropriate safety gear, including safety glasses, gloves, and sturdy footwear. When using power tools, ensure you understand and follow all safety guidelines. It's advisable to consult local building codes and regulations before commencing construction to ensure compliance.
Building a wooden pallet shed is a rewarding project that combines cost savings with environmental responsibility. By following these detailed instructions and prioritizing safety, you can create a durable and functional storage solution that will serve you well for years to come. Remember that while this guide provides a comprehensive overview, individual adjustments may be necessary depending on specific circumstances and available materials.


No comments:
Post a Comment
Note: Only a member of this blog may post a comment.